Wiki Editing
1 - Introduction
Before reviewing the notes of this course, it is highly recommended that you first pass the Wiki Basics course. This course covers more complex investigations in Wiki markup and some of the administrative aspects of being a member of the Wiki Staff. In this course, code examples are in code blocks and output in bold or block quotes where appropriate.
2 - More Wikipedia Coding
This chapter of the course will outline some of the useful templates in the DJBWiki that weren't explained in the Wiki Basics course. While not particularly essential, these features of the Wiki can be very useful, although they are often overlooked.
2.A - Useful Templates
Most likely, the only template you'll have really seen the use of, and the only one outlined in Wiki Basics, is the Infobox Template placed on nearly every article, from NPCs to Clans and Houses. While templates will be explained in further detail in the fourth section of this course, this section will briefly explain two of the more commonly used templates.
2.A.1 - Quotes
You've probably seen a lot of these on the featured articles, since a lot of high quality articles use them. They can look good right at the top of an article or at the top of a chapter, but they can be used anywhere.
The coding for a quote is {{quote|<quote>|<speaker>}} for example:
{{quote|What in Revan's name... What did I just see? Get me an answer. Now.|Muz during the Eighth Great Jedi War}}
"What in Revan's name... What did I just see? Get me an answer. Now."
— Muz during the Eighth Great Jedi War
Note that links, and other bits of coding such as <br /> HTML tags to drop a line, also work inside quotations. This allows you to quote multi-line poetry or conversations by dropping a line and adding in speech marks where appropriate. If you have a two-line conversation (one from two people each), you can use the Dialogue template.
2.A.2 - Succession Boxes
Succession Boxes are typically seen at the bottom of a character article. They are useful if you have multiple positions and want a clear list of them all. To begin a succession box, you must first surround it with {{positions}} and {{end}}, like so:
        {{positions}
        {{succession box
        | title = Quaestor of House Acclivis Draco
        | years = 25 ABY - 29 ABY
        | before = Cyris Oscura
        | after = Timbal
        }}
        {{end}}
You repeat the succession box as many times as necessary, but only use the start and end coding once. The before and after are your predecessors and successors, and the years should be in ABY format. This will be explained shortly.
2.A.3 - Main and Further
These two templates are rare in character articles, but are ubiquitous in articles like a Clan prospectus. The purpose of these templates is to standardize the look of linking to pages that contain more information on a topic.
The {{main}} template simply tells people where to find the main article for particular pieces of information. You use it like this:
{{main|[[Great Jedi War]]}}
Main article: [Great Jedi War]
Because of the nature of the template, you can also link to multiple "main articles" like this:
{{main|[[Eighth Great Jedi War]] and [[Invasion of Jusadih]]}}
The {{further}} template is nearly identical to the {{main}} template. The only difference is that, instead of saying "Main article: ..." it says, "Further information: ..." You also use it in the same way that you would the {{main}} template:
{{further|[[Great Jedi War]]}}
{{further|[[Great Jedi War]] and [[Invasion of Jusadih]]}}
Further information: [Great Jedi War] and [Invasion of Jusadih]
2.B - Tables
While not usually useful in the average character article, tables can be very useful for pages such as master student pages and policy pages. Rather than explain it generically, I will give an example from a page I am currently updating.
        {| border="1"
        ! Dossier# !! Name !! Merit Rank !! Merit Points
        |-
        | 11 || Niemand "Duda" Machweg || Archduke || 865
        |-
        | 129 || Natth a'Niel Palpatine || Archduke || 821
        |}
The first line simply starts the table with {| and then you can add text directly after that to act as attributes, like specifying the border width. You can add attributes to the table's data cells as well by typing right after the first |.
To add a row into the table, start with the | key, and add two of them when you want to move onto the next column, adding |- in a line between each row. Using an exclamation mark instead makes the text bold and centred, which is useful for headings. |} closes the table.
If you know HTML, you can also use that to construct tables. Wikipedia's Help pages have a great article on Wiki tables.
3 - Special Pages
Let's take a break from coding... Special pages are just what they're called: special. Special pages are automatically generated, so they cannot be edited. Special pages are generally ignored by the majority of the regular users, but they are used and checked frequently by Staff members who must complete their duties, from deleting unused images to checking for red links. This section will familiarize you with some of the most well-known special pages.
3.A - Recent Changes

If you don't know about the Recent Changes page, you probably don't use the "Show preview" button as much as you should. The picture above shows a typical view of this page. All Staff members visit this page often to check who made edits when and to what article. When a Staff member tells you to use the "Show preview" button, they are telling you that because they don't want this page filled with your edits to a single page. It gets annoying.
3.B - Broken/Double Redirects

(Click the image above to see how to find the Broken Redirects and Double Redirects pages.)
When a Staff member checks the Recent Changes page and sees that a page was deleted, the first thing they will do is to check the Broken Redirects page. This page lists broken redirects, redirects that link to nonexistent pages. Here is an image of a tedious Broken Redirects page:

By using the "What links here" link on the left-side navigation bar, that unlucky Staff member has to then check each redirect to see if any page links to it. The link circled in red is the "What links here" link:
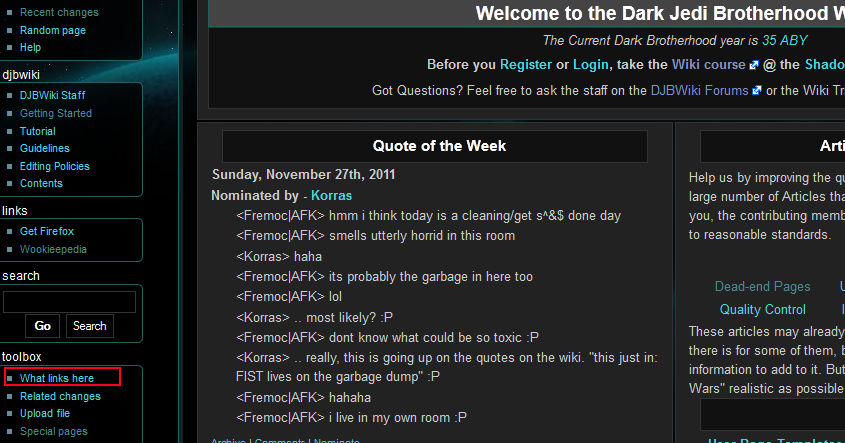
If there are any pages that link to it, the links in those pages must be changed. If there are not any pages that link to it, our frown turns upside-down! Why? Because we get to use our delete button! (See Section 5.1 on deleting.)

When a Staff member checks the Recent Changes page and sees that a page was moved, the first thing they will do is to check the Double Redirects page. This page lists double redirects, redirects that link to redirects. Mediawiki (the Wiki software that the DJBWiki uses) cannot process double redirects correctly, so they must be changed to point to a page, not a redirect.
3.C - Uncategorized Images/Pages
"Every page and image must be categorized!" decreed the Wiki Tribune to a cheering audience of hundreds. So every page and image was categorized. And all was good in the land.
That is an excerpt from my favorite book. Even though it is only a fictional tale, the Brotherhood's Wiki Staff and Tribune attempt to emulate this tradition of categorization, organization, and happiness. As you may have guessed, the Uncategorized Pages page lists the pages that are not categorized, and the Uncategorized Images page lists the images that are not categorized.
Check out the Categories list if you don't know where your article should be categorized. (Note that there are 267 categories as of this writing.)
3.D - Unused Files
A recent study conducted by prisoners of the Dark Jedi Brotherhood concluded that members of the Wiki Staff LOVE to delete unused images. We love it because it is fun and it makes us feel powerful.
As long as you use the images that you upload within 24 hours, you will be fine. Otherwise, we delete them. If you take an image out of your article, and no other article uses it, we will delete it. If the Staff deletes an image that you want, you may request one of the Staff members to restore it; if you do not use it within 24 hour again, it will be deleted again.
3.E - Wanted Categories/Pages
If you've ever had experience with a Wiki, you would know that red links are links to nonexistent pages, called "wanted pages." Similarly, links to nonexistent categories are superfluous (and usually a mistake) and are called "wanted categories." These red links are superfluous, and the Staff loves to eliminate them because they don't serve a purpose.
Avoid creating red links at any cost. To check if something is a red link, link to it in the article that you are editing and then use the Show preview button. If it shows up red on the preview, then it links to a nonexistent page, and the Staff will destroy it.
4 - Templates
Templates are, in the most basic terms, a page inside a page. The DJBWiki uses several templates, from the ones described in chapter two of this course to the notice on the Main page. Templates can make your life easier by helping to eliminate redundancy.
4.A - Using
In order to understand what's going on when you use a template, it is suggested that you familiarize yourself with the idea of transclusion. Like the introduction of this chapter says, transclusion simply means "a page inside a page".
To use templates, you surround the template name with two curly brackets, {{ and }}, on each side. For example:
{{Featured article}}
would transclude the Featured article template.
Even though it is an uncommon desire, if you want to link to a template, but not use it in that page, the Staff has just the solution:
{{tl|templatenamehere}}
As you can see from the example above, the {{tl}} template uses a pipe, |, and then specifies the template name. In templates, like images, each pipe separates a parameter like so (note that not every template requires parameters):
{{template|parameter1|parameter2|parameter*n*}}
For example, the {{quote}} template that was examined in Section 2.1a uses two parameters:
{{quote|What in Revan's name... What did I just see? Get me an answer. Now.|Muz during the Eighth Great Jedi War}}
4.B - Creating
If you have ever seen a template page, you know that the page prefix is "Template:" just like how an image page begins with "Image:". As always, if you are creating a page, you should first check to see if it already exists by searching for it.
4.B.1 - Parameters
    :"''{{{1}}}''"
    :- {{{2}}}
The above code is directly from Template:Quote. As you can see, the two parameters are {{{1}}} and {{{2}}}. All parameters are specified by using three curly brackets. You can also specify parameters by name, e.g. {{{name}}}, like the parameters in the character infobox templates (Template:Character).
You can also specify default arguments in case the user does not specify the parameter.
<td colspan="2" style="padding:0; background:#{{{BG1|000000}}}; color:#fff;">
The above code is from Template:Infobox. Notice {{{BG1|000000}}}. The parameter uses a parameter? Close, but no cigar. The parameter is actually specifying its default value in the event that the user does not specify a value for the parameter. Templates without named parameters can also do this.
4.B.2 - Noinclude, Includeonly, and Onlyinclude
The first tag that we will examine is <noinclude>. The following code, also from Template:Quote, "says" that only the template page, and not pages that use the template, will be categorized in Category:Utility templates:
<noinclude>[[Category: Utility templates|{{PAGENAME}}]]</noinclude>
The next example (from Template:Featured, the template used to designate Featured articles) is the opposite of the <noinclude> tag, the <includeonly>. It tells the parser that only the articles that use the template, and not the template page, will be categorized in Category:DJBWiki featured articles.
<includeonly>[[Category: DJBWiki featured articles]]</includeonly>
The last tag is <onlyinclude>. This tag indicates that only text between it and its closing tag, i.e. </onlyinclude>, will be transcluded. The Wikipedia project page on Transclusion has this rather congested paragraph about it:
This is the most subtle of the partial transclusion tags because it often overrules the others. If there is at least one pair of "onlyinclude" tags on a page, then whenever this page is transcluded, it is only the material within the "onlyinclude" tags which gets transcluded. There can be several such sections, and within each such section, some material might be further excluded by "noinclude" tags, and might also be surrounded by "includeonly" tags so that it does not appear on the original page itself. But material outside the "onlyinclude" tags will be ignored when the page is transcluded onto another page. This can be useful, for example, to repeat a small part of one page on a second one: just surround the small part by onlyinclude tags, and transclude it onto the second page.
5 - Other Useful Notes
5.A - Redirects
Redirect pages redirect a user to another page instantaneously. These kinds of pages are helpful when a character's name has changed or if a particular thing is called by two names, e.g. "Dark Side Degrees" and "Shadow Academy Degrees". Note that talk pages of redirect articles should be deleted.
To create a redirect page, use this simple line of code:
#REDIRECT [[article name]]
For example, the [Dark Side Degrees]https://wiki.darkjedibrotherhood.com/view/Dark_Side_Degrees&redirect=no redirect page simply contains:
#REDIRECT [[Shadow Academy Degrees]]
5.B - Interlinks
Currently, the DJBWiki supports two different interlinks: interlinks to Wookieepedia and interlinks to character dossiers. Interlinks link to external pages (pages not a part of the DJBWiki itself), but look much like internal links (links to other DJBWiki articles). This is to create a more seamless look and feel.
To link to a Wookieepedia article, use this code:
[[starwars:Galactic Empire|displayed text]]
where "Galactic Empire" is the name of the Wookieepedia article, and "displayed text" is the text displayed on the article. This would be the result of the above code:
[displayed text][Galactic Empire]
Similarly, you can link to any DJB dossier:
[[dossier:3491|My Dossier]]
This would link to the dossier of the user with the pin 3491 and display "My Dossier" like so:
Please log in to take this course's exam